I’ve been thinking more recently about adding a watermark back to the lower corner of my photos. So! Here’s a little guide on how I did it!
Getting your signature digitized:
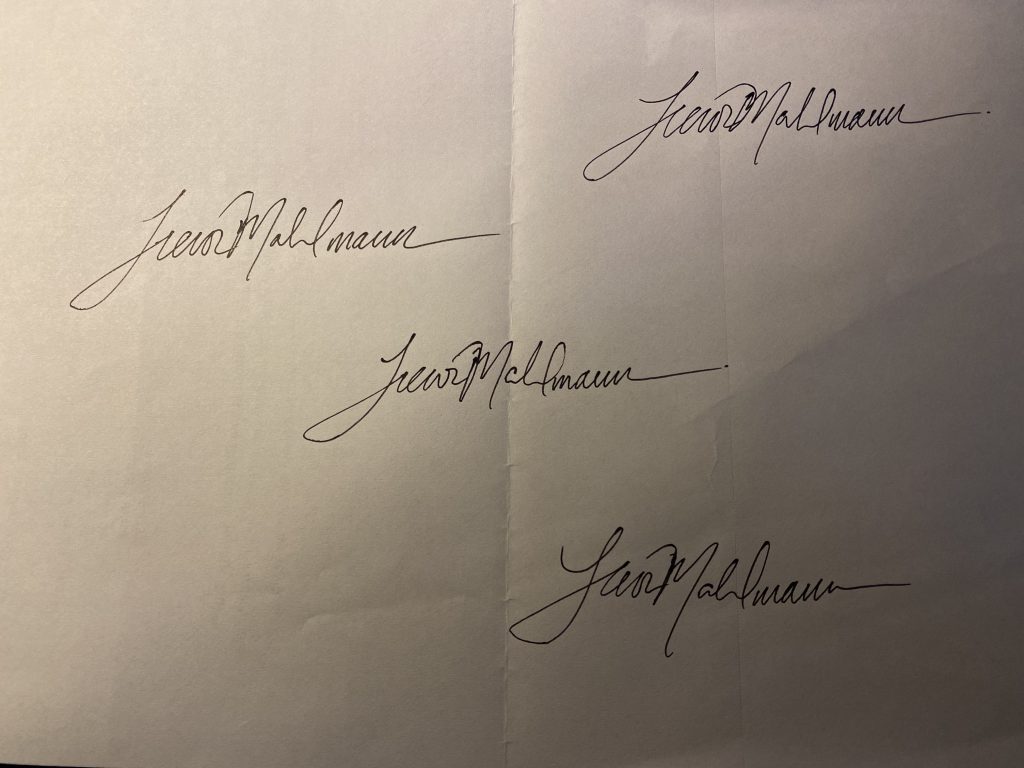
- Sign your name a bunch of times with your favorite pen on a piece of white printer paper. Repeat until you are satisfied with your results
- Open “Preview” for Mac.
- Click on “Tools” in the Header. Navigate to Annotate > Signature and click on: Manage Signatures
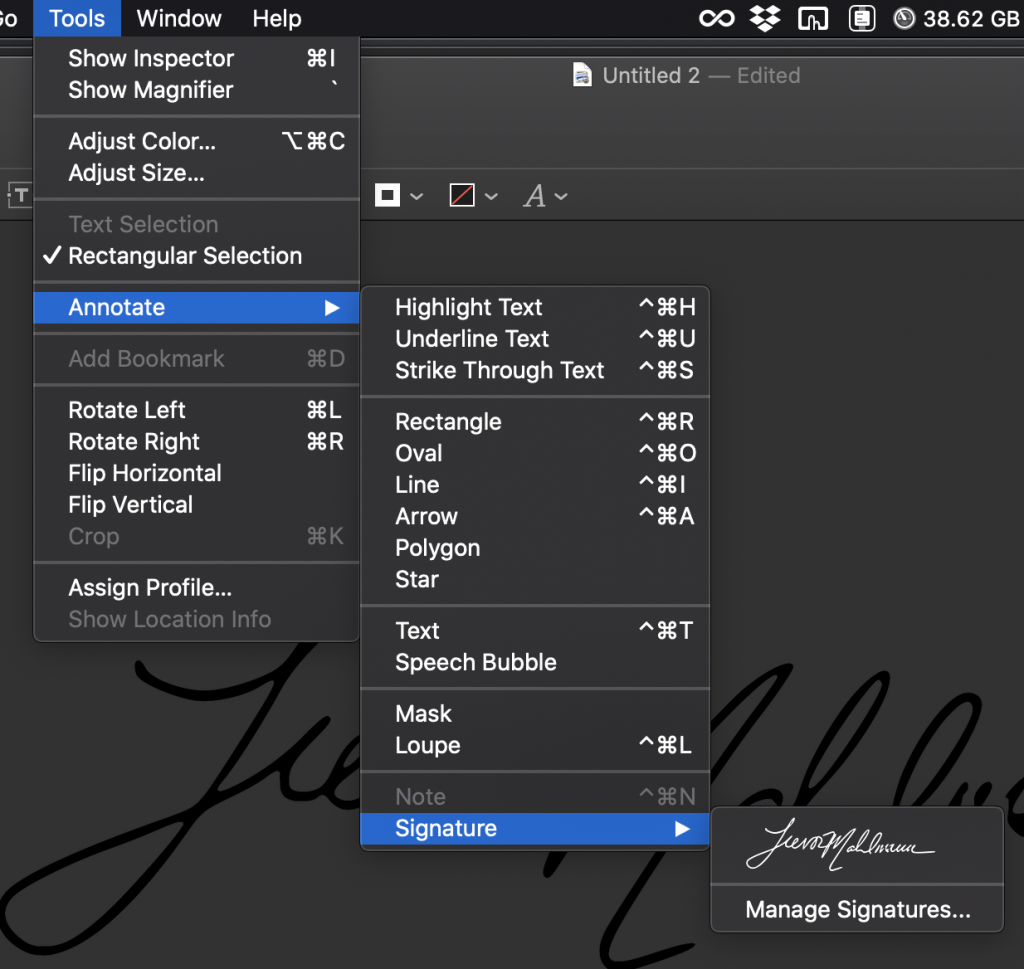
- Once there, click on “Create Signature“
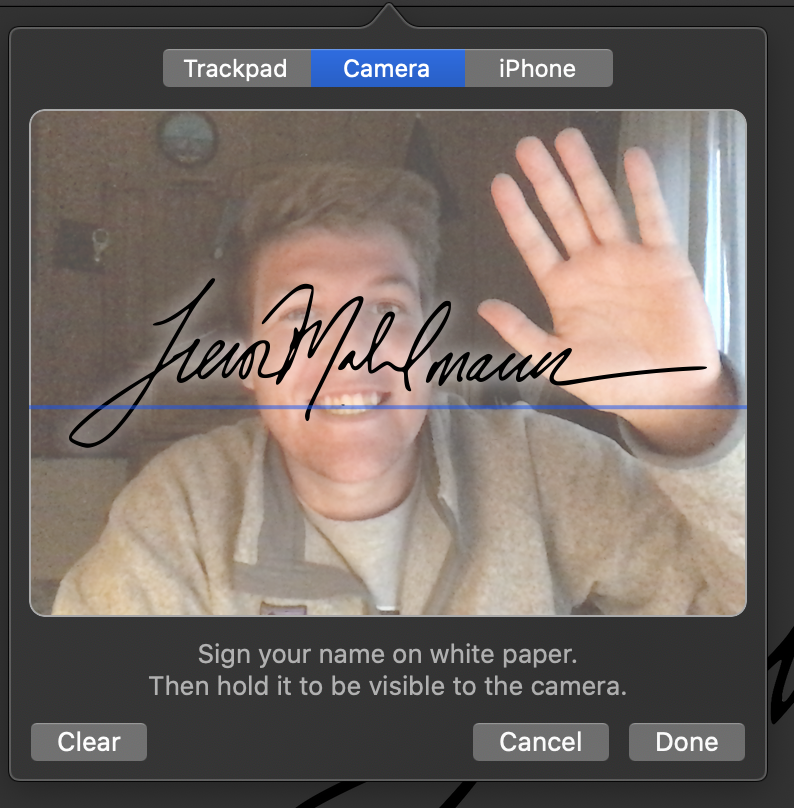
- Next, you will be provided with a few options: Trackpad, Camera, and iPhone.
- You can use the trackpad or iPhone to input the signature, but it won’t really be true handwriting unless you import via a paper-signed copy and the camera. I suggest this
- Click on “Camera.” (and wave to your beautiful self in the likely poor-quality 720p EyeSight camera window that comes on screen)
- Find the signature on the piece of paper you like best, and hold it up to the camera, aligning it to the line on the screen the best you can.
- It will be backwards at first. Don’t worry about this. Preview will reverse it as soon as it digitizes it
- If it digitizes it and you don’t like the framing or you cut off part of your signature, just click “Clear” and move the paper back slightly to try again.

- Once you’re satisfied with the results, wave to your beautiful self one last time and click “Done!”
- The Signature now is saved under Tools > Annotate > Signature.
- To annotate any documents you may need to sign with a digital signature with ease, just open up the PDF with Preview, and go to: Tools > Annotate > Signature. Select the one you’d like to use, and drag/resize to your liking. Boom!
Turning your digital signature into a PNG watermark for photography
- Open a new blank document in TextEdit on your Mac.
- Type Command + P (at the same time) or go to File > Print.
- In the bottom left, click where it says PDF and select Open in Preview.
- Go to: Tools > Annotate > Signature. Select the signature you’d like to use.
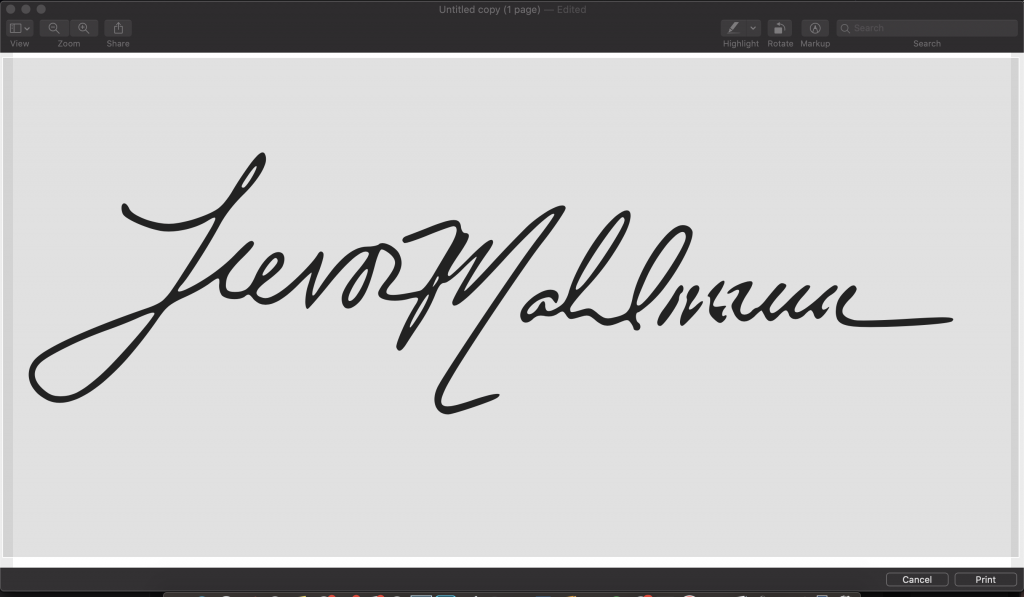
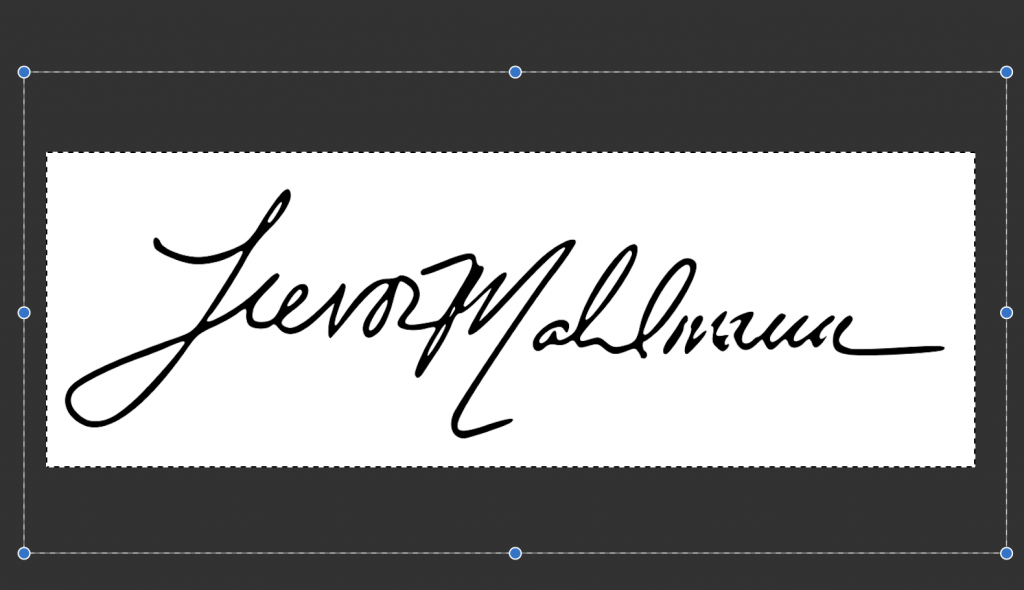
- Make your Preview window fill your entire screen.
- Use the blue corner markers on the signature to also make it as large as possible, with a little bit of room left and right. (If the blue markers go away, just click on the signature again)
- Save this document as a PNG (CMD + S or File > Save) name it “YourFirstName-YourLastName-Signature.PNG” and close the window.
- Open “YourFirstName-YourLastName-Signature.PNG” with Preview.
- Draw a rectangle around the signature with the picker tool in Preview and type CMD + K or Tools > Crop to crop the signature with equal room top and bottom as you made previously left and right.
- Once cropped. Use the Wand tool (clicking and drawing a line away from where you clicked) to remove each of the white areas (background) from your signature.
- Use the Delete/backspace key to delete these areas. Repeat until you have removed all of the white areas of the image. The length of your line will determine the threshold for the selection of more/less white pixels.
- Once happy with how your image looks, save it as a PNG!
- Now you can import it into Lightroom/Photoshop or any of your other favorite editing programs that allow custom watermarks (inverting it if you want white vs black, adding text like I did in-between the two lower sections of my watermark, etc)
If you’d like to see more about how to import your logo into Lightroom and set it up to be used as a watermark – let me know!
Leave your email below to keep up-to-date with the latest in spaceflight! (A few emails a month, max.)