So, you want to view / photograph the Starlink satellites in the night sky? You’ve come to the right place! You’ll want to be quick, because each day that passes — the satellites get farther and farther apart from each other. After awhile, they will be on their own vs organized in a nice cluster.
What is Starlink? Start by reading this Ars Technica piece here.
You’ve got a few options.
#1
The first of which is a free website called CalSky.com (account not required, but recommended) that allows you to predict upcoming passes, solar/lunar transits, and more.
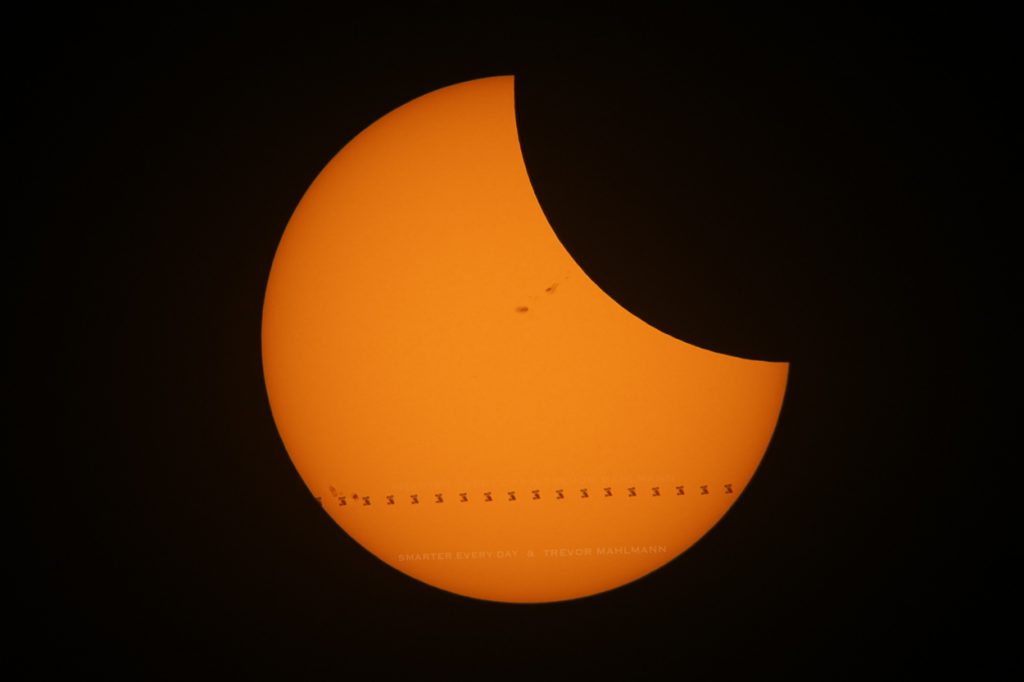
CalSky was a big part of the preparation Destin and I used to capture the solar eclipse + ISS transit back in August of 2017:
- Go to CalSky.com.
- Start by setting your location here. (You can view Starlink without making an account, but I would recommend it so you can save a location for later use)
- Click on ‘Satellites‘ then ‘Sat Library‘
- Select your duration at the top of the page for the amount of time you would like to see future fly-by’s. (I usually select ‘1 Week’)
- Type “starlink” in the or find a satellite by name or number box.
- Click on “Sighting Opportunities” (bookmark this page)
- Check the following boxes: (you can utilize others like transits/close encounters later on, but for the sole purpose of viewing use these)
- Show satellite passes
- Satellite must be illuminated
- Scroll back up to the top and click “GO” again to refresh.
- Scrolling down, you’ll see a list of the upcoming passes of the Starlink constellation.
- If you are confused by the 24h time format “21:36:42” that means 9:36:42pm. (12 + 9 = 21) There is an option to switch to the 12h format (9:36 pm) located on the page where you set your location. (#2 on that page)
- To know where to look, use the little map on the right side of each pass:

- This image shows the satellites will be starting from the southwest direction, peaking in the southeast part of the sky ~45deg up or so (halfway to straight up), then going towards the northeast.
- Here’s another example:
 this one shows the satellites coming from northwest, going straight overhead, and towards the southeast. Starlink satellites will always be coming from the west and going east. (NW->SE & SW->NE, never from the east)
 - If you’re not familiar with which way is North/South/East/West, grab a compass app on your phone’s app store to assist.
- Using the “another example” #2 map above as one: Appears = where the blue line starts (NW), Culmination = where the point of the blue arrow is (straight over your head), Disappears = where the blue line ends (SE) They are not always directly overhead, some may reach their peak height closer to the horizon, in one area of the sky (like #10, peaking in the SSE sky ~45° up)
Paid
If you are looking to photograph the trail of satellites or get a bit more advanced with your viewing, there is a paid tool I recommend called FlightClub.io created by Declan Murphy that you can utilize in combination with CalSky to plan out (with a 3D viewer) your photography to a T and visualize the Starlink fly by’s in real time on your phone in the field.
FlightClub is primarily a rocket launch visualizations, simulations/mission planning, and photography but today we are going to use it to help us view/photograph the Starlink cluster of satellites.
It allows you to enter GPS coordinates, camera/lens information and pan around to experiment what millimeter focal length would be the best to rack to from your location.
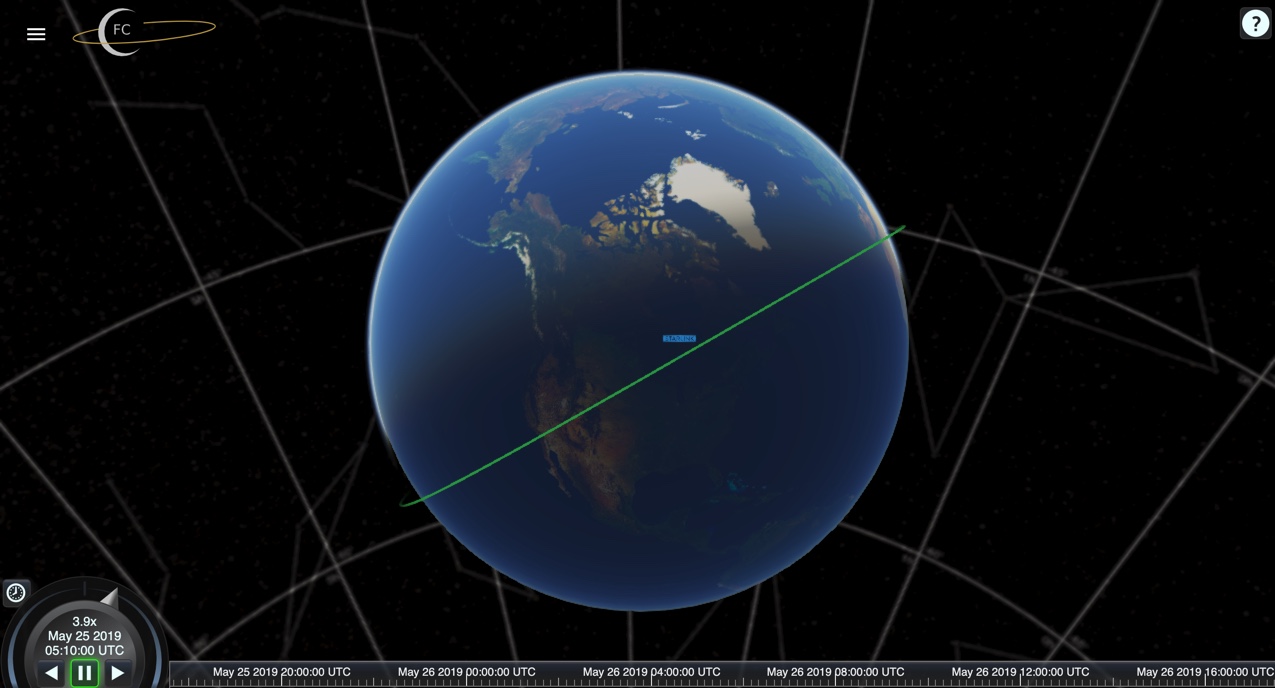
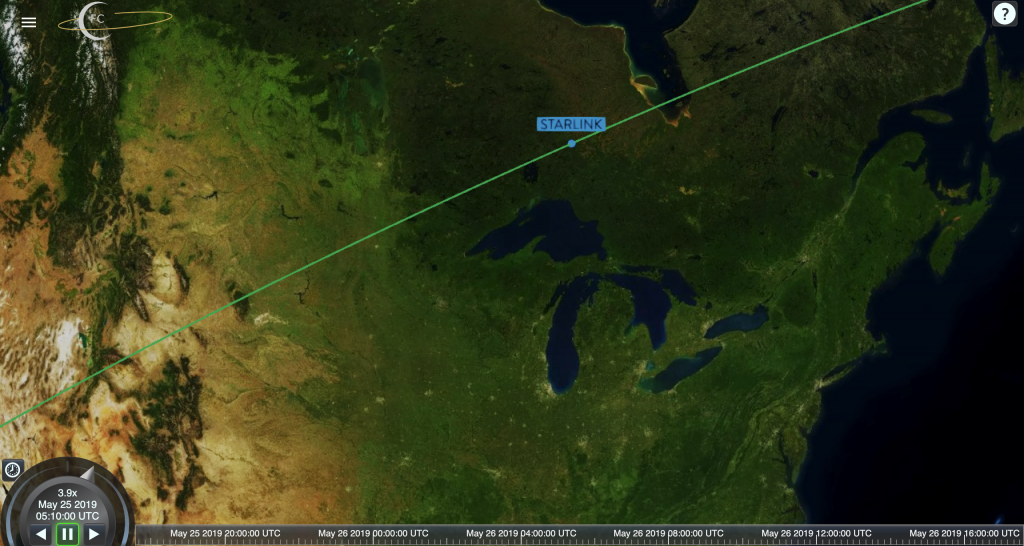
For example: here is a visualization of what a photo would look like of tonight’s (May 25th, 2019) ~10:45pm ET (2:45 UTC May 26th) Starlink pass with a full frame camera and 11mm lens looks like from Chicago, Illinois. (looking SSE)
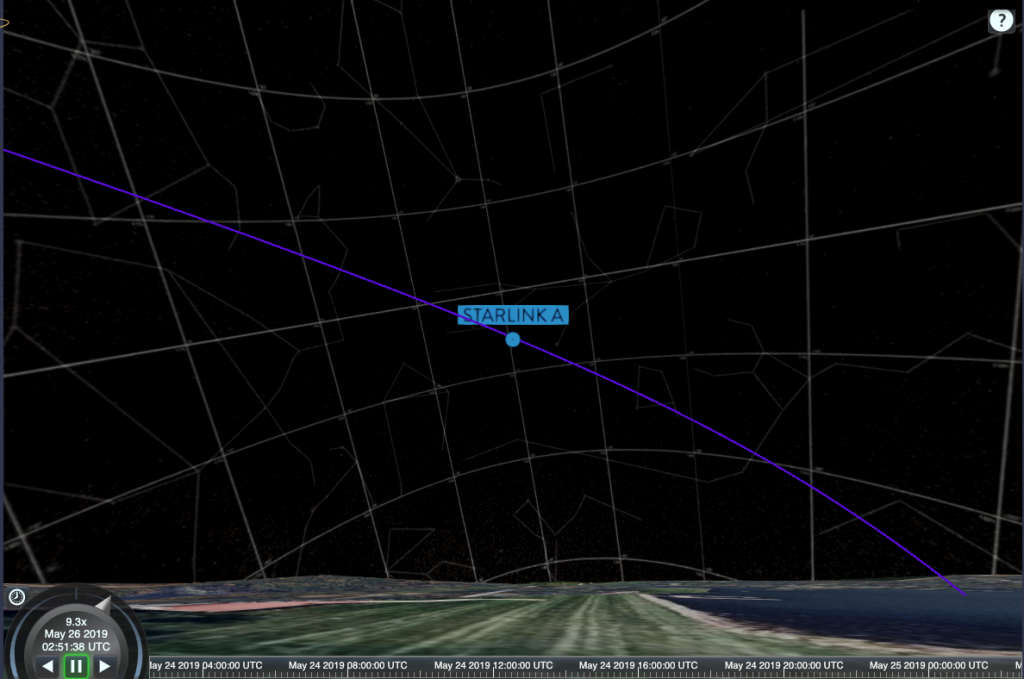
as well as one with a 50mm lens, same setup and location:

Besides the awesome capabilities you get (rocket launch / starlink long exposure photo aid) you are also supporting a self-employed person in Declan. He quit his day job and moved to somewhere with a much lower cost of living so that he could focus and rely on FlightClub, full time.
- Become a $10 / Geostationary Transfer Orbit level Patron of Declan’s. This is the minimum tier that gets you access to the Photog Tools (3D Viewer)
- Wait 5 minutes for FlightClub and Patreon to have a chat and add you to the list of chosen ones.
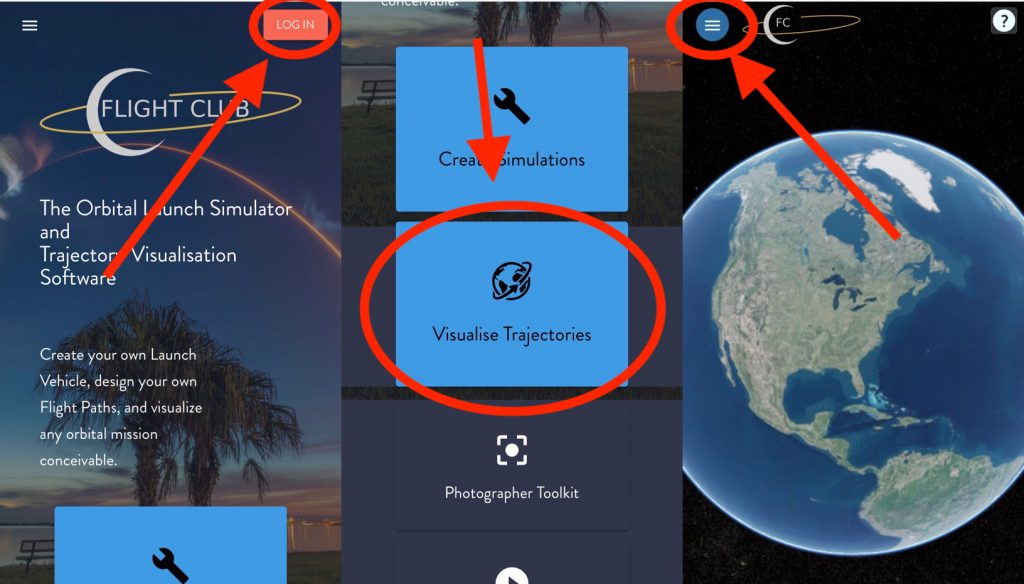
- Go to FlightClub.io and “Login via Patreon” with your account in the top right corner. (Click “Allow,” this lets FlightClub know you should have access to the Photographer’s Toolkit – the tools I described above)
- If you were logged in to FlightClub before becoming a Patron – log out and back in via the homepage, clicking on your profile photo, and “Logout”
- Go to FlightClub.io homepage (if the page doesn’t automatically redirect you)
- In the upper right, click your profile photo.
- Find the “Favorite Locations” tab and add a few locations you might be photographing/viewing at (i.e. home, nearby dark sky park, etc)
- It is probably easiest to open Google Maps and find decimal GPS coordinates there by searching for your city and clicking on the map where you want to watch/photograph from.
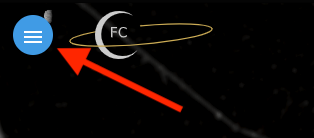
- Click “Visualize Trajectories” then the hamburger menu in the upper left
 .
.
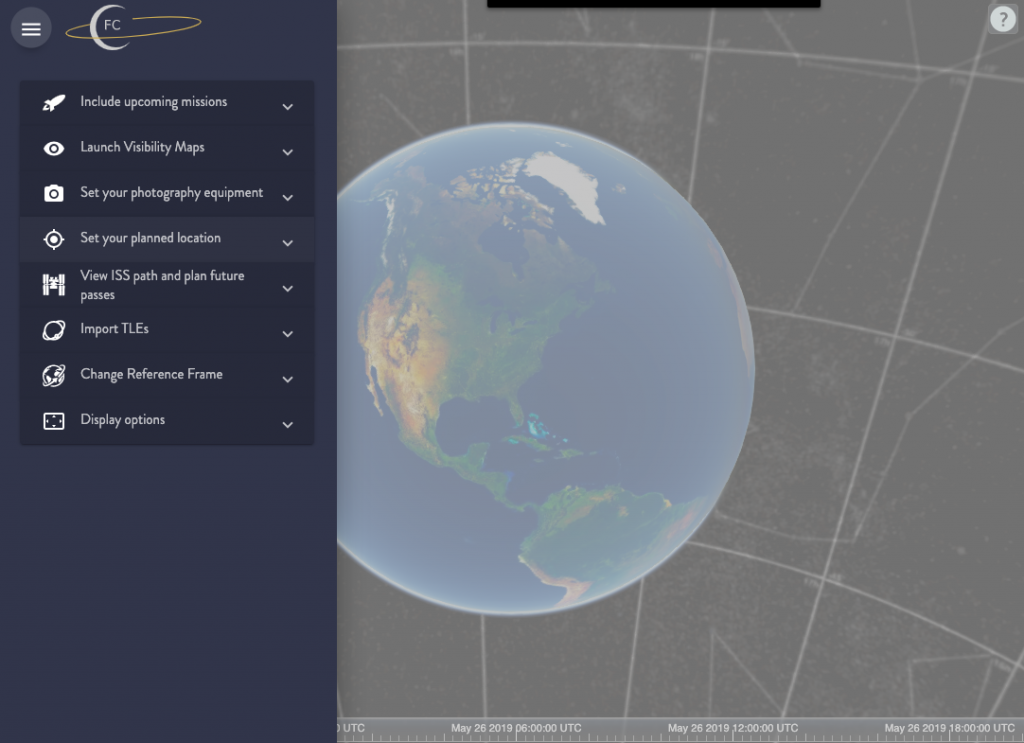
- Here, you will find all the customization options. The ones we will be using today are: photo equipment, location, and Import TLEs
- Set your photo equipment to the camera / lens you plan to use. Click “Set.” The field-of-view will snap to that view.
- Navigate to “Set your planned location” and in the “Favorite Locations” dropdown, select the one you would like to use that you added earlier and use an elevation of 25 meters. Click “Set.” FlightClub will now zoom to your planned location. Wait a few seconds if it sets you below ground, FlightClub will auto snap you up to ground level at those GPS coordinates in a few seconds.
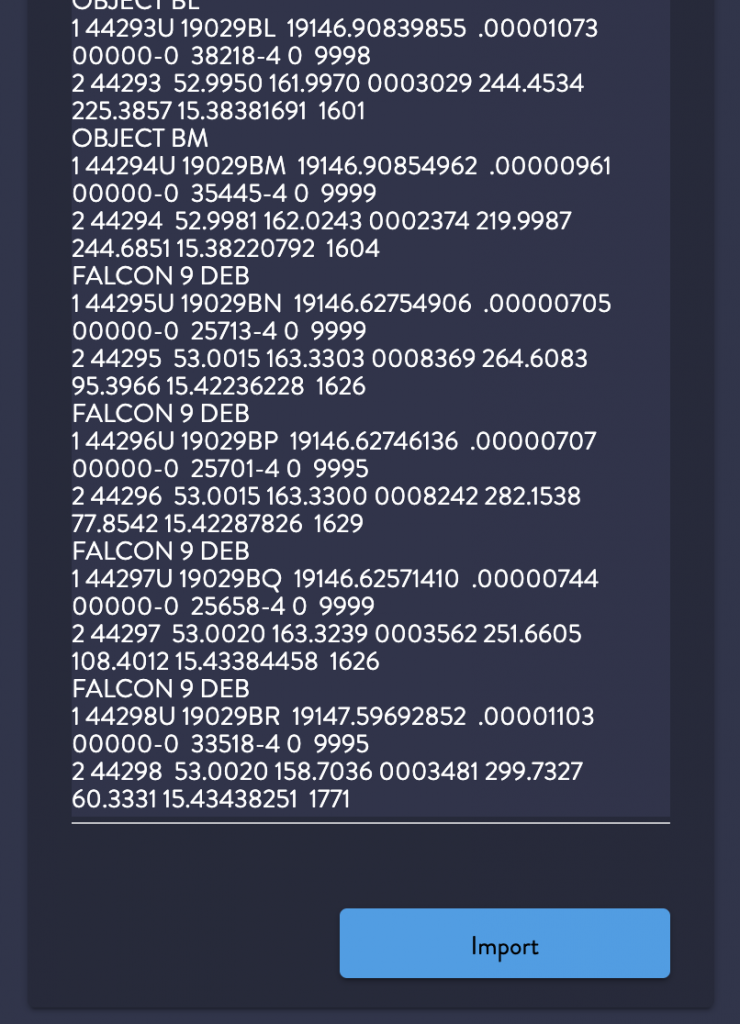
- Now for the TLEs (two-line orbital element sets). Navigate here.
- Update: The page has all 60 Starlink satellites now, copy the entire webpage
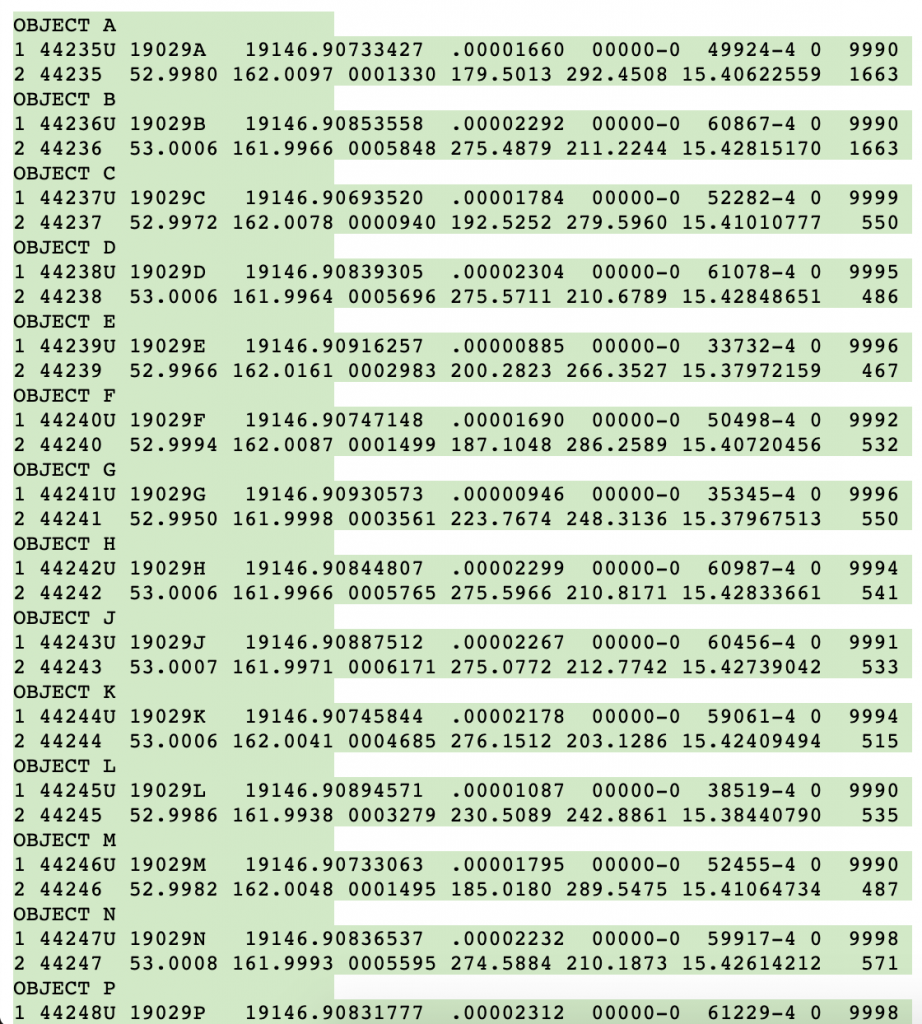
- Update: The page has all 60 Starlink satellites now, copy the entire webpage
- Paste the TLE info you’ve just copied, into the “Import TLEs” section of FlightClub and click “Import.”
- Using the CalSky portion of the tutorial above, determine a good pass for your location.
- Use the time scrubber in the lower left of FlightClub’s 3D viewer to navigate to your time in UTC and begin planning your photo / viewing session in 3D!
- If you’re not familiar with your time in UTC, just google search: “10:30 PM Eastern Time / 22:30 Eastern Time to UTC” (or whatever CalSky tells you is the time of the pass in 12h/24h format)
- Since your camera is 25 meters in the air, you can pan around and use landmarks on the ground to orient yourself, better understand the CalSky map, and where the pass will be in the sky to point your eyes / camera.
Tip #1: Pull up the TLE webpage from before in your mobile web browser and again copy the entire webpage of data. Once you’re at your viewing location, you can pull up FlightClub.io and follow the same by step as above. You can click the little “⏰” icon above the time scrubber (mobile or desktop) to jump to the current time and play in real-time on your phone / tablet. Use your location same as before but in the field for visual (non photographic) aid, select “full frame” for the camera, and type “24” in the “focal length (mm)” box. (if you are photographing and have a 24mm, what a coincidence!) Used on your phone or tablet device, this aids you in finding the satellites in the sky in real-time.
You may need to log in again and it looks slightly different:
–
Good luck with your viewing / photography! Hit me up on Twitter if you still have questions.
Leave your email below to keep up-to-date with the latest in spaceflight! (A few emails a month, max.)