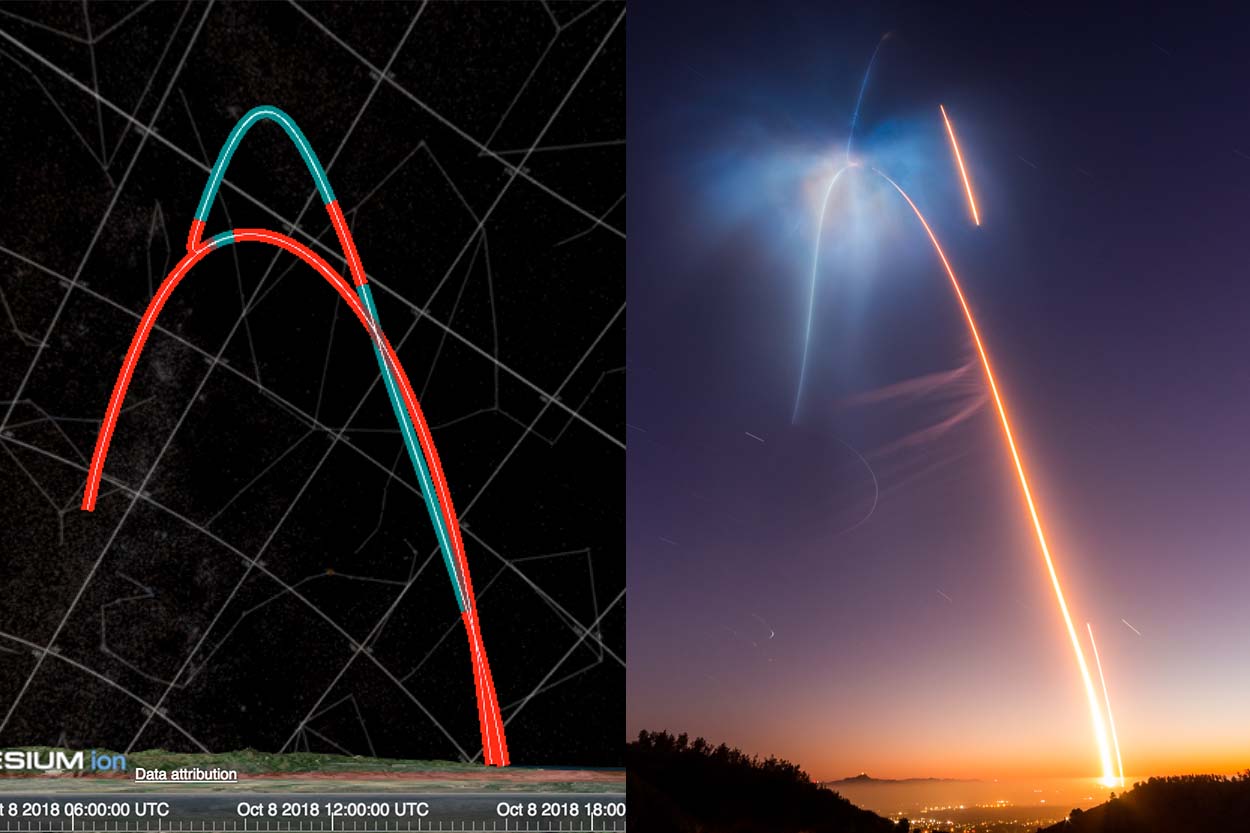
It looks like SpaceX performed a more aggressive boostback burn, almost a boostdown, during the SAOCOM-1A mission. Here’s my analysis of the mission, using pre/post-launch FlightClub data, SpaceX webcast information, and my on-site photos.
What is FlightClub, you ask?
FlightClub is an orbital launch simulator built by Declan Murphy to help visualize rocket trajectories for various purposes. I use it (among other launch photographers) to help plan out my long exposure photos of rockets climbing to orbit.
So pre-launch, I head over to the site and see what things look like as I start to hone in on my creative ideas.
Here is what FlightClub was predicting the SAOCOM-1A mission to look like:
Technicalities: a Canon EF-S 10-22mm lens on a APS-C sized crop-sensor camera oriented horizontally.
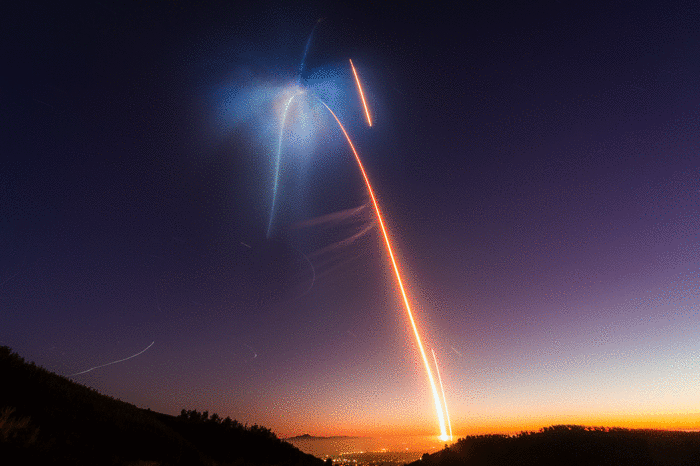
My goal with the project was to capture launch, boostback (boostdown?), reentry, 2nd stage, and landing burn all in one exposure.
No edits, stacking, compositing, ‘photos shot seconds apart’ – none of that. Just straight up, back-to-the-basics long exposure photography. Press the button, let the camera record the light, and stop it after landing.
I prefer traditional long exposures instead of the many above-mentioned methods for many different reasons:
- the instant gratification of seeing the exposure on the back of my camera adds to the adrenaline-filled experience of a launch
- knowing I don’t have a heap of post-processing work to do to put it together
- it is more work to do it all in one, but the challenge of doing so adds to the unique-ness of the image
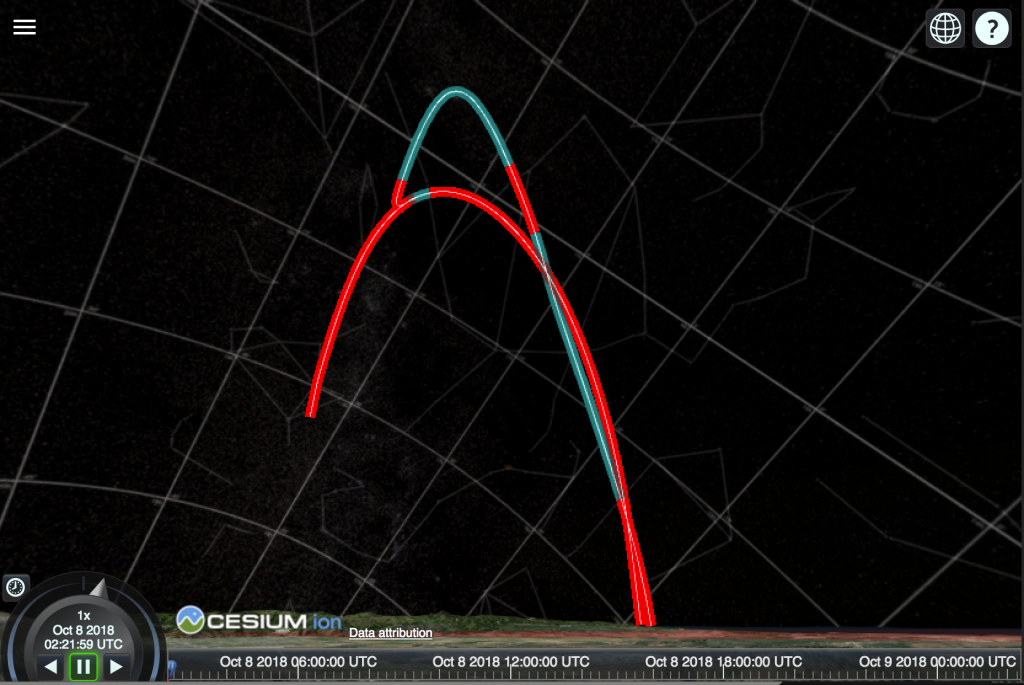
From my viewing location I could observe the rocket directly, so this made framing the shot quite easy.
Here’s a quick iPhone photo to get a gist of the scene:

The Falcon 9 rocket is located at the tip of the arrow.
After waiting on-site at our viewing location several hours before launch, it was time to toss FlightClub’s prediction into the ring and see how it faired, more like FightClub. *ding ding ding*
Here is a back-and-forth GIF comparing what this pre-launch prediction looked like to my actual photo:
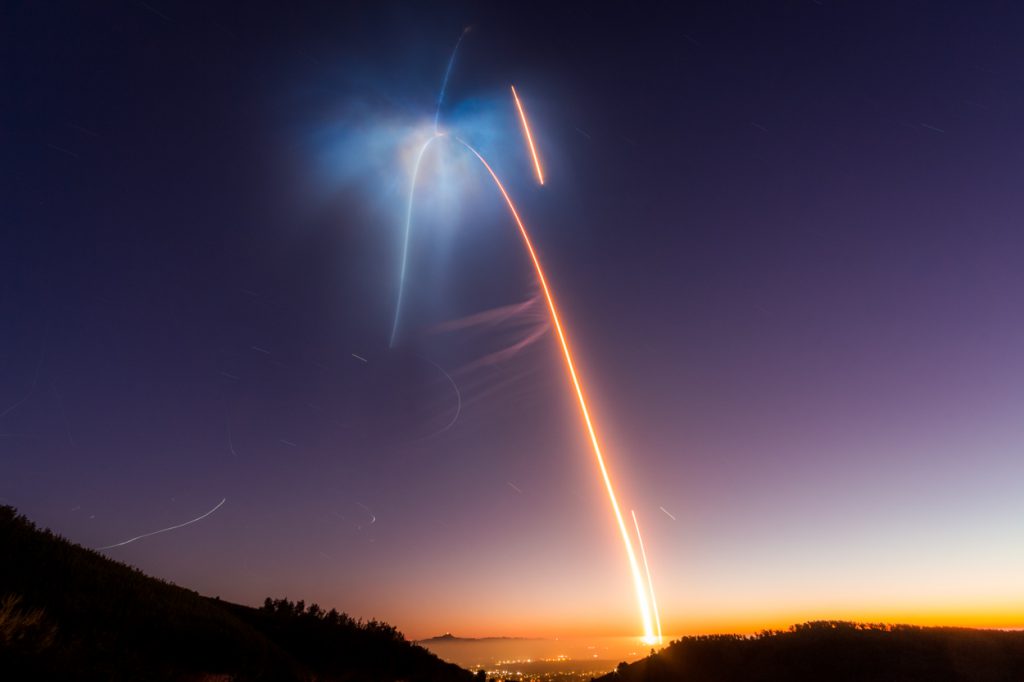
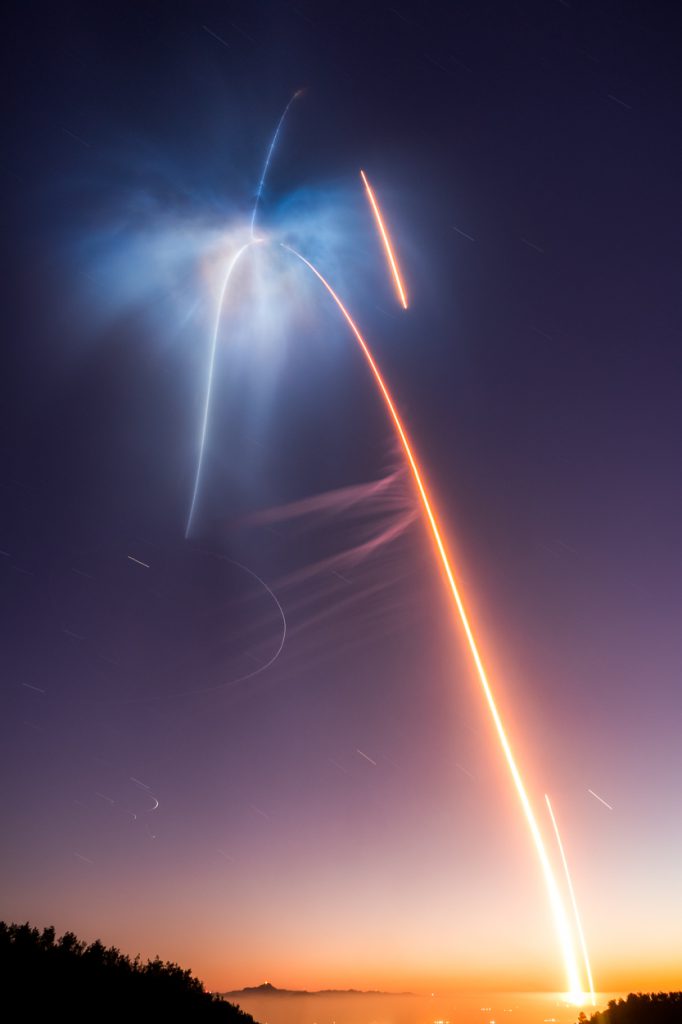
What’s really interesting about this launch is that it was more of a boostdown than a boostback.
It looks like Falcon 9’s first stage flew (mostly) vertically for longer, didn’t give the second stage much horizontal velocity, and the boost back burn sent first stage, at it’s apogee, higher than I expected but did not travel as far downrange as other SpaceX RTLS profiles.
What does that mean?
Well, usually when you hear “Stage 1 has entered its flip” on the webcast, it turns from the direction of its velocity vector (pointing upward and downrange, consider this up and to the left) and boosts back in the opposite direction at 0° (horizontal, to the right) or -5° (engines up and interstage slightly down, to the right).
SAOCOM-1A’s boostback burn started at -28°, directly retrograde to its velocity. Big change from normal. They really wanted to get the stage back slow and as early as possible.
In my research, Falcon 9 first stages usually reach apogees (highest altitude) of ~118-170km on RTLS profiles, SAOCOM-1A did not differ much in this department with an apogee of 134km. What differed here is the downrange distance.
Before, the closest a Falcon 9 first stage on an RTLS profile remained to the launch site was 70km. SAOCOM-1A only traveled 59km downrange. 2nd stage really had to perform the brunt of the work on SAOCOM-1A as this was very much a lofted trajectory.
After all, 2nd stage did not shutdown until T+10 min 14 seconds.
Back to the photos, here is what FlightClub’s post-launch prediction shows, after being adjusted based on webcast data:

And comparing the pre and post launch sims in a back-and-forth GIF:
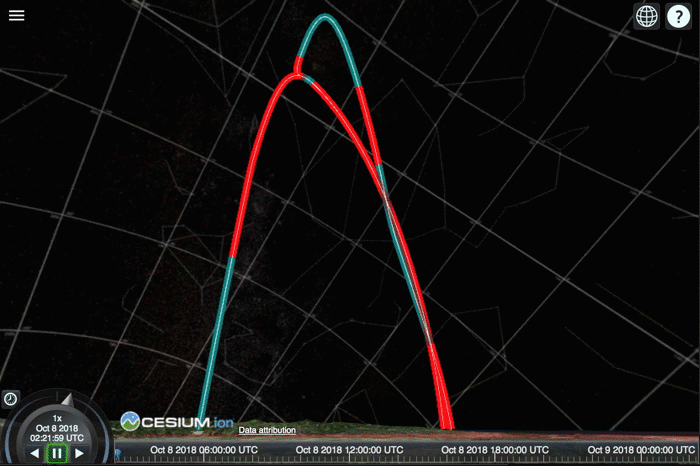
As you can see the first stage flew a lot higher than I planned, but luckily I gave it enough head room to keep it in the frame. Falcon 9’s first stage passed off much of the horizontal velocity building work to the second stage, making it easier for first stage to cancel out its own horizontal velocity and return to landing site sooner/more slowly. (RTLS)
And finally, here is a GIF comparing the post-launch sim and my actual photo.

Still some minor differences with the placement of the reentry/landing burns. but for my photographic purposes – FlightClub absolutely nailed these predictions, yet again, allowing me the chance to take this one of a kind long exposure.
Normally, the first stage performs its boostback burn and sends it on a trajectory short of land altogether and glides in at the last moments, further bleeding off speed, to the landing zone. With SAOCOM-1A, stage 1 performed minimal gliding using the body of the rocket, and is the reason the simulation’s reentry/landing burns appear closer to the launch streaks.
You can watch the boostback burn send it on a trajectory all the way back to LZ-4 here in the Technical Webcast of the official SAOCOM-1A webcast: https://youtu.be/5wdul-fI7Po?t=1508
Last but not least, just like I can be overly critical of myself with distracting elements of an image or it not turning out exactly how I envisioned it in my head, I know Declan/TVD is reading this thinking:
“UGH, nailed the predictions? They were inaccurate, even after matching it to the webcast data!!!111″
This is why you should support his efforts with FlightClub..
If you want to access these Photographer’s Tools in FlightClub to plan your own launch photos, to support Declan because what he’s doing is really cool, because he aims to do this work full-time, or you (like me) think it’s magic, you can support him here on Patreon.
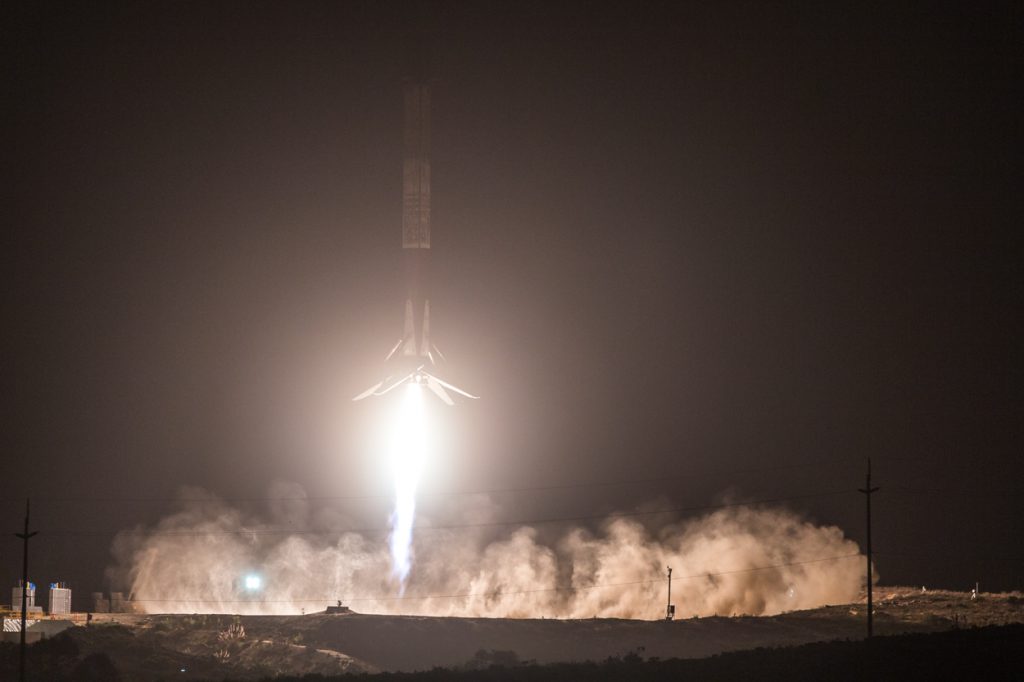
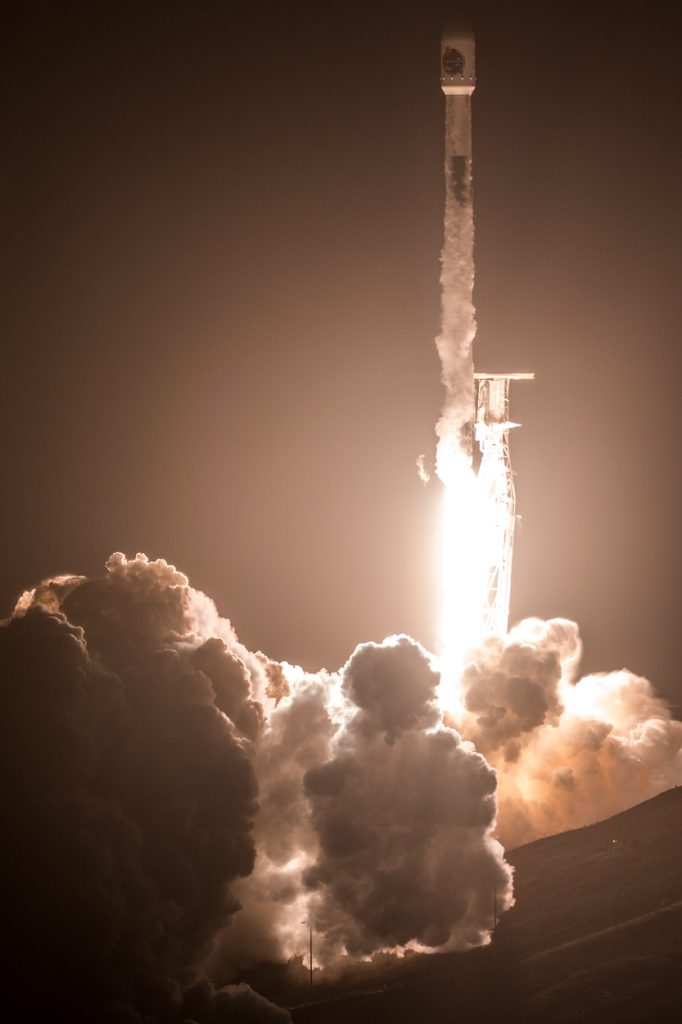
Below, you’ll find a few of my favorite photos from this launch, long exposure and otherwise. If you’d like to know the settings, get a download for your phone/desktop wallpaper, or hang a print – you can find links to those below each respective photo!
Until the next launch, keep looking up!
—
Tl;dr: FlightClub did it again!
—
Favorite photos from this launch:
Leave your email below to keep up-to-date with the latest in spaceflight! (A few emails a month, max.)